Using Proxy Servers To View Facebook At Work

Many workplaces restrict access to social media platforms like Facebook to improve productivity and minimize distractions. Network administrators achieve this by employing website filtering tools. These tools can block access based on domain names (e.g., facebook.com) or IP addresses (unique numerical identifiers for devices).

How to Use Proxies for Facebook

Step 1:  Buy proxies for Facebook. 

SquidProxies offer private proxies that are guaranteed to work for your Target URLs.

Step 2:  Authorize your actual IP address.

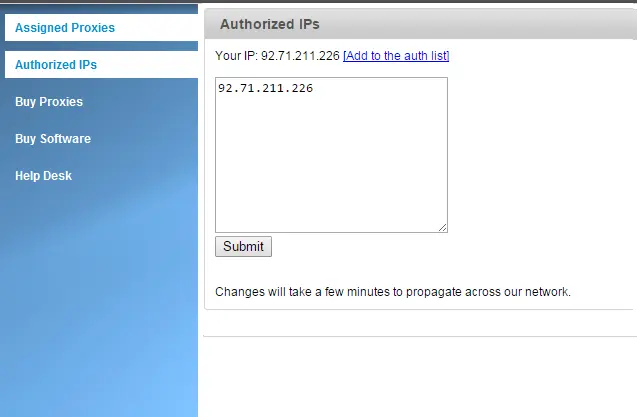
Log in to your to your Proxy Account and go to the  “Authorized IPs” tab.

Enter  your real IP address in the designated box.

Click “Submit” and wait for system propagation.

How to change your IP Address - Step 2 Authorize your IPs

Step 3: Verify your Facebook proxy’s performance.

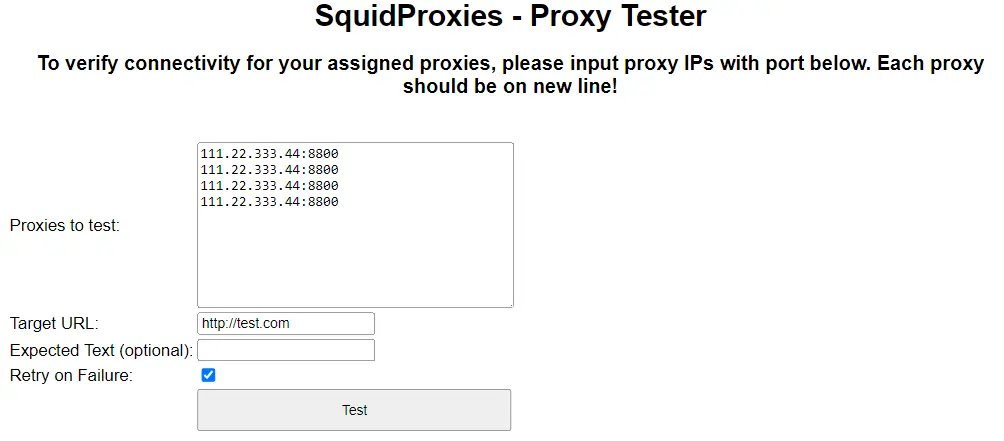
Click on the “Test Proxies” tab. Enter the proxy IP addresses and port numbers you intend to use for Facebook. 

On the Target URL field, type in https://facebook.com/.

Click on the Test button.

If the test returns “SUCCESS,” your chosen proxies are compatible with Facebook and ready for use.

Encountered an error? No worries! If the test shows an error message, simply contact our support team. We’ll be happy to help you troubleshoot the issue or replace the proxies, if necessary.


Proxy Checker - How to check your poxies - Step 2

Step 3: Configure your device to use the proxy server.

How you set up the proxy depends on what kind of device you have and its operating system. Here’s a breakdown for the most common ones:

Windows:

  1. Open the Settings app.
  2. Click on “Network & internet”.
  3. Look for “Proxy” and click on it.
  4. Under “Manual proxy setup”, turn on “Use a proxy server”.
  5. In the “Address” field, enter the proxy server address from your chosen list.
  6. In the “Port” field, enter the port number from your list.

Mac:

  1. Open “System Preferences”.
  2. Click on “Network” and choose the name of your Wi-Fi network.
  3. Click the “Advanced” button.
  4. Select the “Proxies” tab.
  5. Check the box next to HTTP Proxy.
  6. In the “Address” field, enter the proxy server address from your list.
  7. In the “Port” field, enter your proxy’s port number.
  8. Click “OK” to save your changes.

Mobile Devices:

Setting up a proxy on a phone or tablet can be trickier because there’s no one-size-fits-all approach.

Here are two options to find instructions for your device:

  1. Look for a section on Wi-Fi or network settings. 
  2. Do a quick web search for “[your device model] + configure proxy”. For example, if you have a Samsung Galaxy S22, you could search for “Samsung Galaxy S22 configure proxy”.
  3. Contact us and we’ll be happy to assist you!

Table of Contents

Read more blogs

Get Private Proxies for Facebook

Buy 10 to 1,000 Private Proxies

Related Articles

Free proxy servers often rely on several factors to keep the operation running. It's important to remember that free often comes with trade-offs.

A proxy server list is a collection of IP addresses and ports for proxy servers. These servers act as intermediaries between your computer and the internet

Proxy server functions and definition: More than intermediaries! Discover their roles in load distribution, bandwidth control, and content filtering.